If you have an Exchange account
you are also capable of creating a
Calendar and sharing the Calendar to your team, other departments, or the world. This
allows them to know your schedule and more effectively collaborate with you creates a more
coordinated and planned schedules or events with you and your team.
There are several ways you can share your Calendars and you can do so via Outlook
Desktop and via Outlook Web Access (OWA). However, we recommend using Outlook
Desktop to enjoy the full features of your
Exchange Calendar. In this article, we’ll guide you through the following:
Sharing Calendars on Outlook Desktop
Once you’ve
set up your
Email Exchange Mailbox on the Outlook desktop application, you will be able to
access your Exchange Calendar and share it.
Follow these steps to access your calendar, then continue with the instructions that you need:
| Step 1. |
Open Outlook on your desktop. |
| Step 2. |
Click on the Calendar icon at the bottom-left section of the application. |
| Step 3. |
Continue with the steps that you need to share your calendar: |
|
|
Share calendars via quick invitation
| Step 1. |
While on Calendar view on Outlook Desktop, click Share Calendar from the
ribbon at the top.
|
|
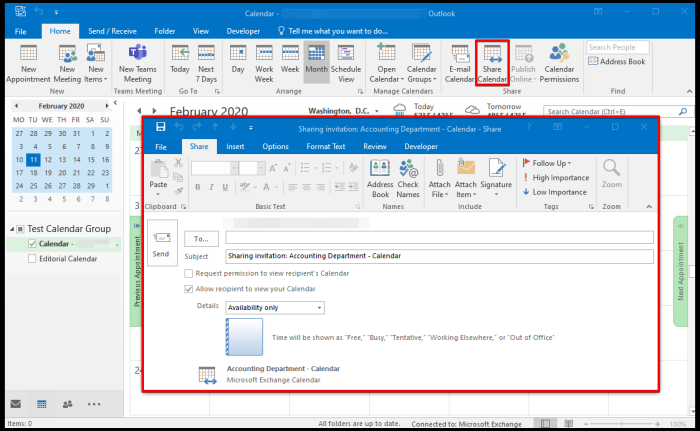 |
| Step 2. |
Complete the following and click Send: |
| To |
Enter the recipient’s email address. You can enter multiple email addresses at once. |
| Subject |
You can use the automated Subject line or write your own. |
| Request permission… |
(Optional) Tick this box if you would like to request permission to view recipient’s Calendar.
|
| Allow recipient.. |
Ensure that this box is ticked to allow recipient to view your Calendar |
| Details
| Set which calendar details you would like to share: |
|
- Availability only
- Limited details
- Full details
|
| Message Box |
(Optional) You can compose an email message to send along with your
Calendar Invitation. Use this to provide instructions and other information.
|
Your recipient will need to confirm the invitation sent and access your Calendar.
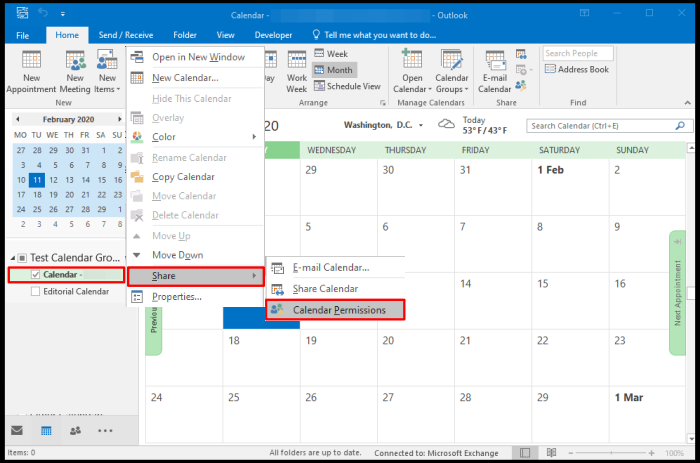
Share calendars and set permissions
| Step 1. |
While on Calendar view on Outlook Desktop, right-click on the Calendar that you'd like to share. Go to Share and click Calendar Permissions.
|
|
|
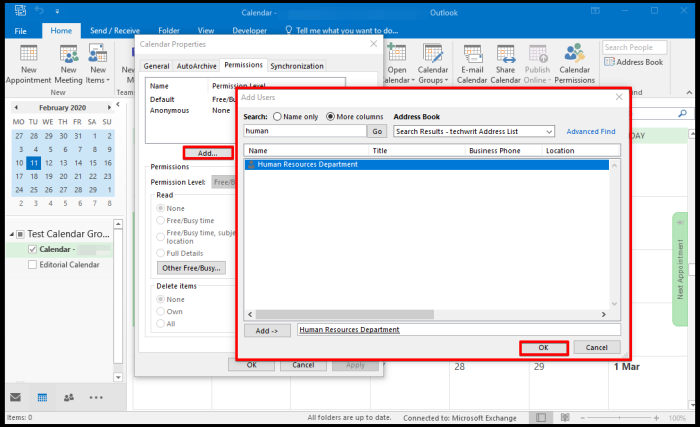
| Step 2. |
Click Add to select the user for whom the Permissions will be set. |
|
|
| Step 3. |
Once added, click on it and set the Permission Level to use. |
|
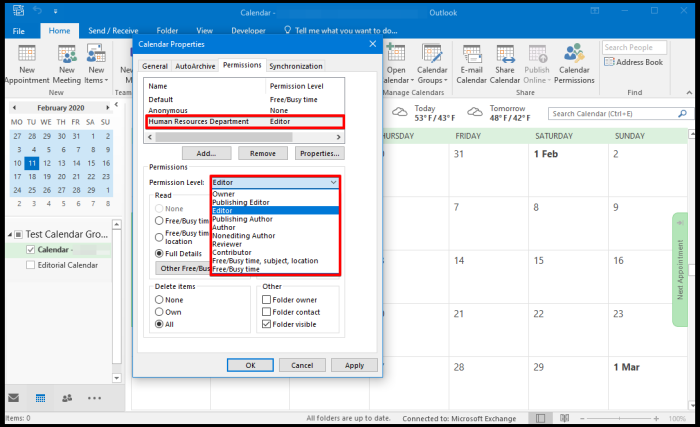 |
| Step 4. |
All your other settings will adjust according to the Permission Level selected. You can customise it, or you can click Apply, then OK. |
Email your calendar
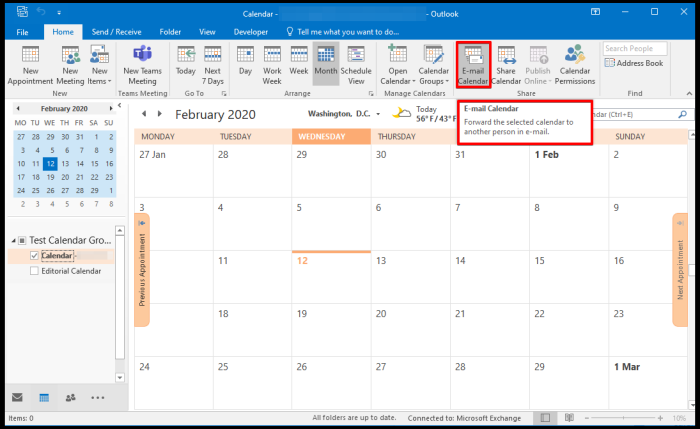
| Step 1. |
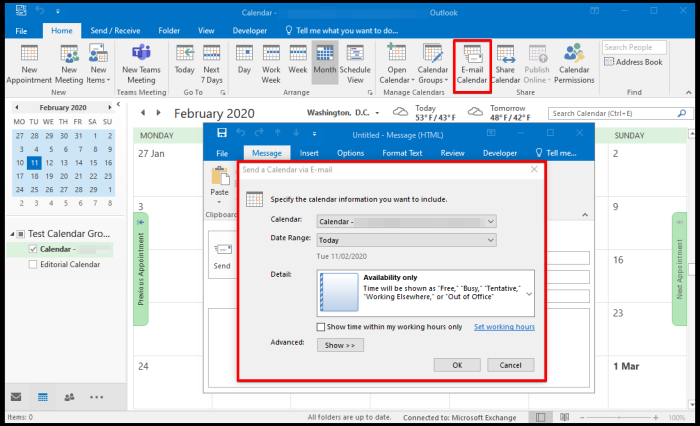
While on Calendar view on Outlook Desktop, click E-mail Calendar from the ribbon at the top. |
|
|
| Step 2. |
| Calendar |
Select the calendar that you’d like to share. |
| Date Range |
Specify the calendar dates to share. |
| Detail |
Set which calendar details you would like to share:
- Availability only
- Limited details
- Full details
|
| Message Box |
(Optional) You can compose an email message to send along with your Calendar Invitation. Use this to provide instructions and other information.
|
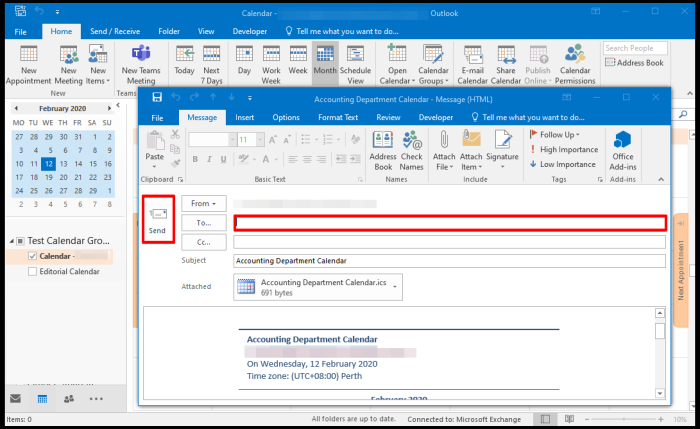
| Step 3. |
Enter the recipient’s email address and click Send. |
|
 |
Publish your calendar
| Step 1. |
While on Calendar view on Outlook Desktop, click Publish Online from the ribbon at the top. |
|
 |
| Step 2. |
You will be routed to the OWA login page on your browser. Enter your username and password, then click Log in. |
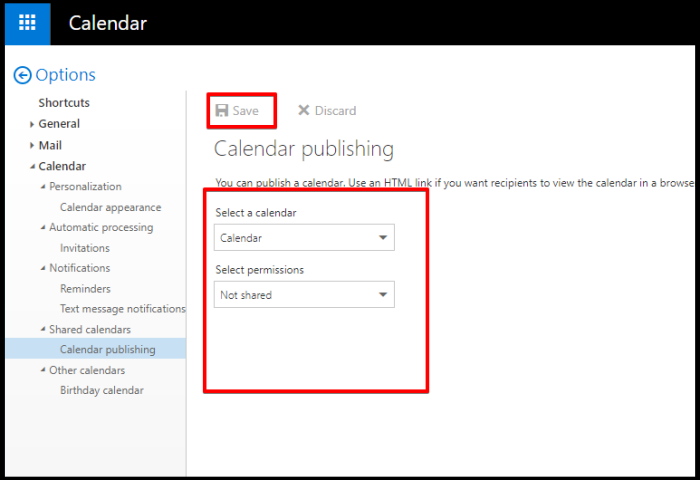
| Step 3. |
Select a calendar to publish and select permissions to apply, then click Save. |
|
 |
| Step 4. |
An HTML and ICS link will appear once published. Click on the links to preview. Anyone with these links will be able to view your published calendar. |
|
 |
Sharing Calendars on Outlook Web Access
When sharing a calendar on OWA, you can do so via quick invitation or by publishing it online. Follow the instructions that apply to you:
Share calendars via quick invitation on OWA
| Step 1. |
Log in to Outlook on your browser.
|
| Step 2. |
Click on the 9-Square Icon at the top menu and select Calendar. |
| Step 3. |
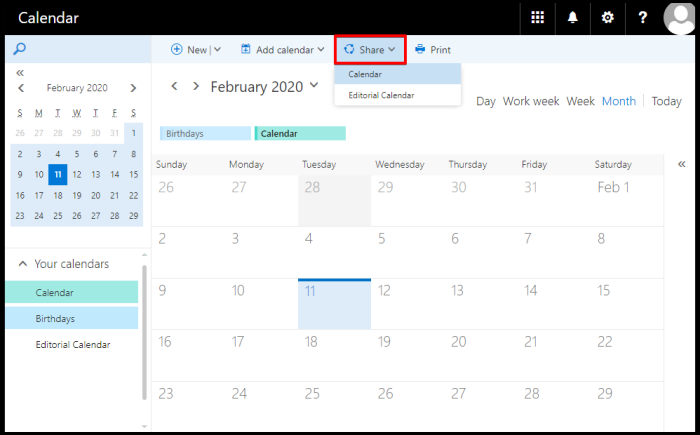
While on Calendar view on OWA, click Share and select the specific calendar that you’d like to share. |
|
 |
| Step 4. |
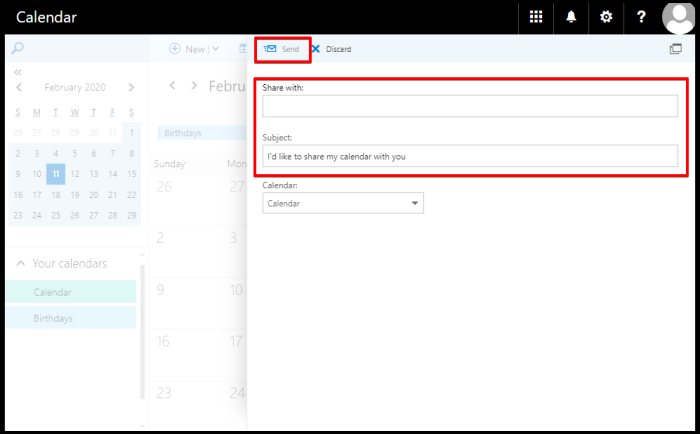
Enter the recipient’s email address in the Share with field, edit the Subject (optional), and click Send. |
|
 |
Publish your calendar via OWA
| Step 1. |
Log in to Outlook on your browser. |
| Step 2. |
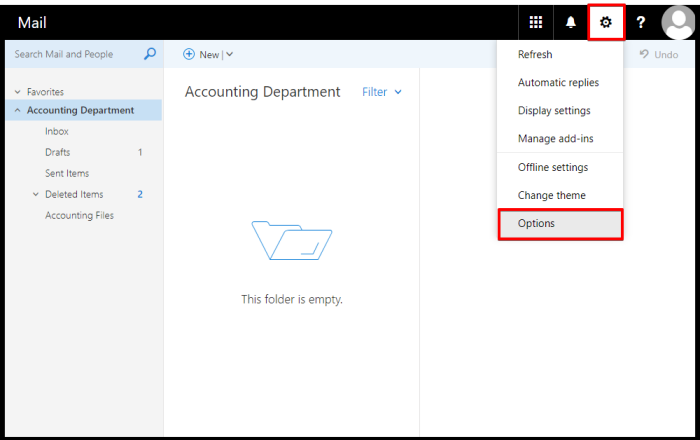
Click the Gear Icon at the top menu and select Options. |
|
 |
| Step 3. |
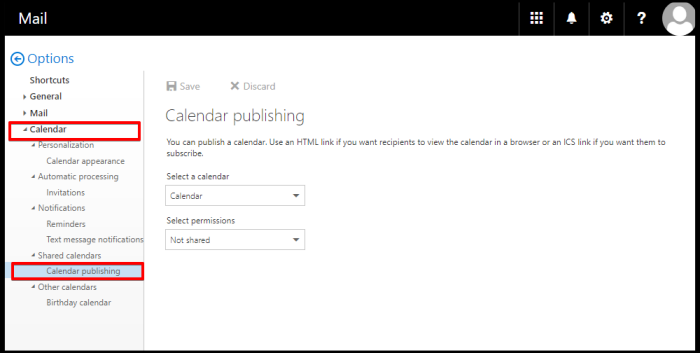
Click Calendar to expand it and click Calendar publishing. |
|
 |
| Step 4. |
Select a calendar to publish and select permissions to apply, then click Save. |
|
|
| Step 5. |
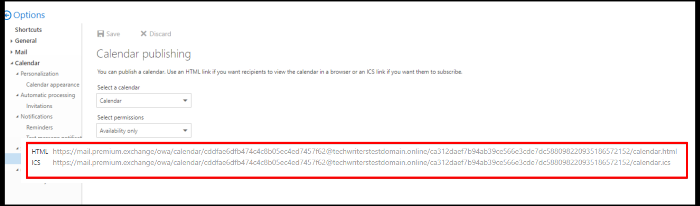
An HTML and ICS link will appear once published. Click on the links to preview. Anyone with these links will be able to view your published calendar.
|
|
|
Grouping Your Calendars on Outlook Desktop
If you are inviting frequent users to a meeting or a team on Outlook and wants to see their
schedule at once – grouping your Calendars can be handy to you and your team. You have
different ways to create Group Calendars on Outlook Desktop. In this part, you will
learn how to:
Create Group Calendars
| Step 1. |
While on Calendar view on Outlook Desktop, click the Calendar Groups button. |
| Step 2. |
Enter the Name of your Calendar group and click Ok. |
| Step 3. |
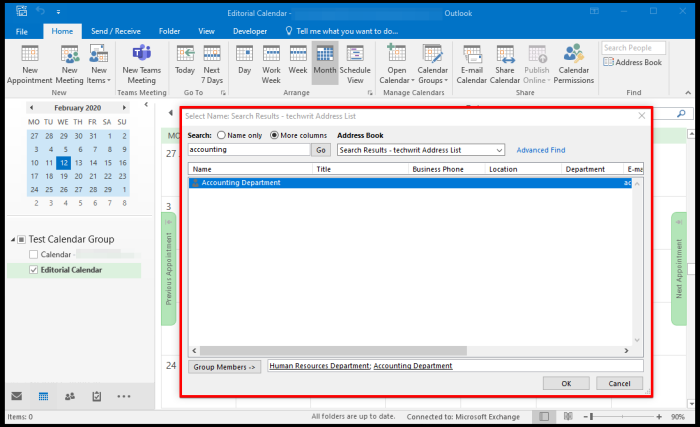
Enter the Name of the user you wish to be added to the group and click Group Members and
click Ok button |
|
 |
The created calendar group will appear on the left side panel on your Calendar view window.
Create Group Calendars Based on Selected
Calendars
| Step 1. |
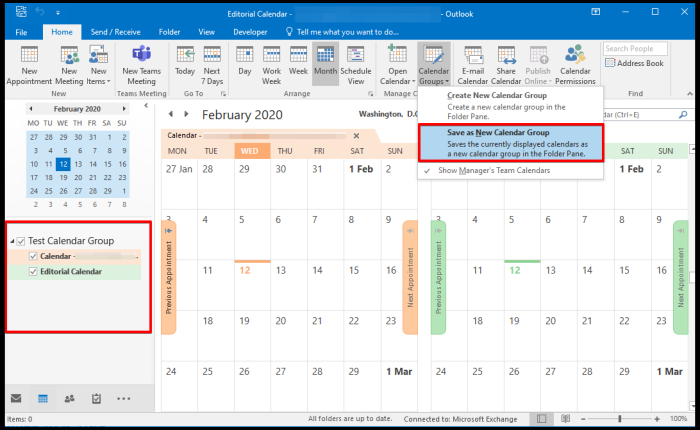
Select the Calendars you wish to group on outlook from the right side pane. |
| Step 2. |
Click the Calendar groups option and select Save as. |
|
 |
| Step 3. |
Enter the Name of your New Calendar Group. |
Your newly created group calendar will appear on the left side panel of your Calendar view window.
Learn how you can manually open a shared calendar via Outlook Desktop or OWAi this linked guide. Please let us know if you need further assistance or if you have any questions. We'd love to help!
Fantastic...Thank you for your feedback =)
Sorry... Please submit a support ticket or try another search.