Website Builder is a platform that allows you to create powerful websites without the need for any technical background, or hiring a developer for that matter. With Website Builder, you are given access to easily customisable templates, a drag-and-drop editor, a mobile editor, and a quick-setup social media integration.
One of the Website Builder tools that will help you create your website is called a Feature. Features on Website Builder are the elements that you can add to the webpage. Each type varies depending on the information you want to add, like pictures, text, and buttons. The following are the things that you can do to the Website Builder Features:
Familiarise yourself with the Website Builder Interface for more accessible and enjoyable website creation.
Add a Website Feature
This is useful if you want to insert something within a website block that is not included in the Website Builder template you chose. Follow the steps below to add a website feature:
- Log in to your Website Builder editor.
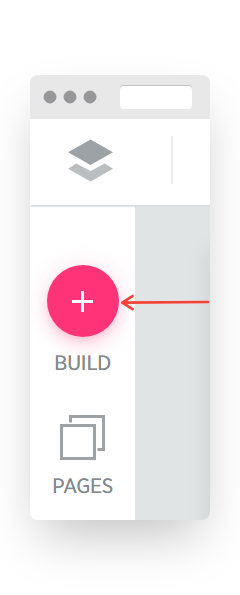
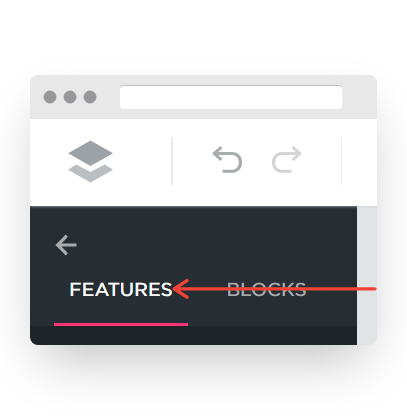
- On the Website Builder, click BUILD on the Side Menu, and then choose FEATURES.
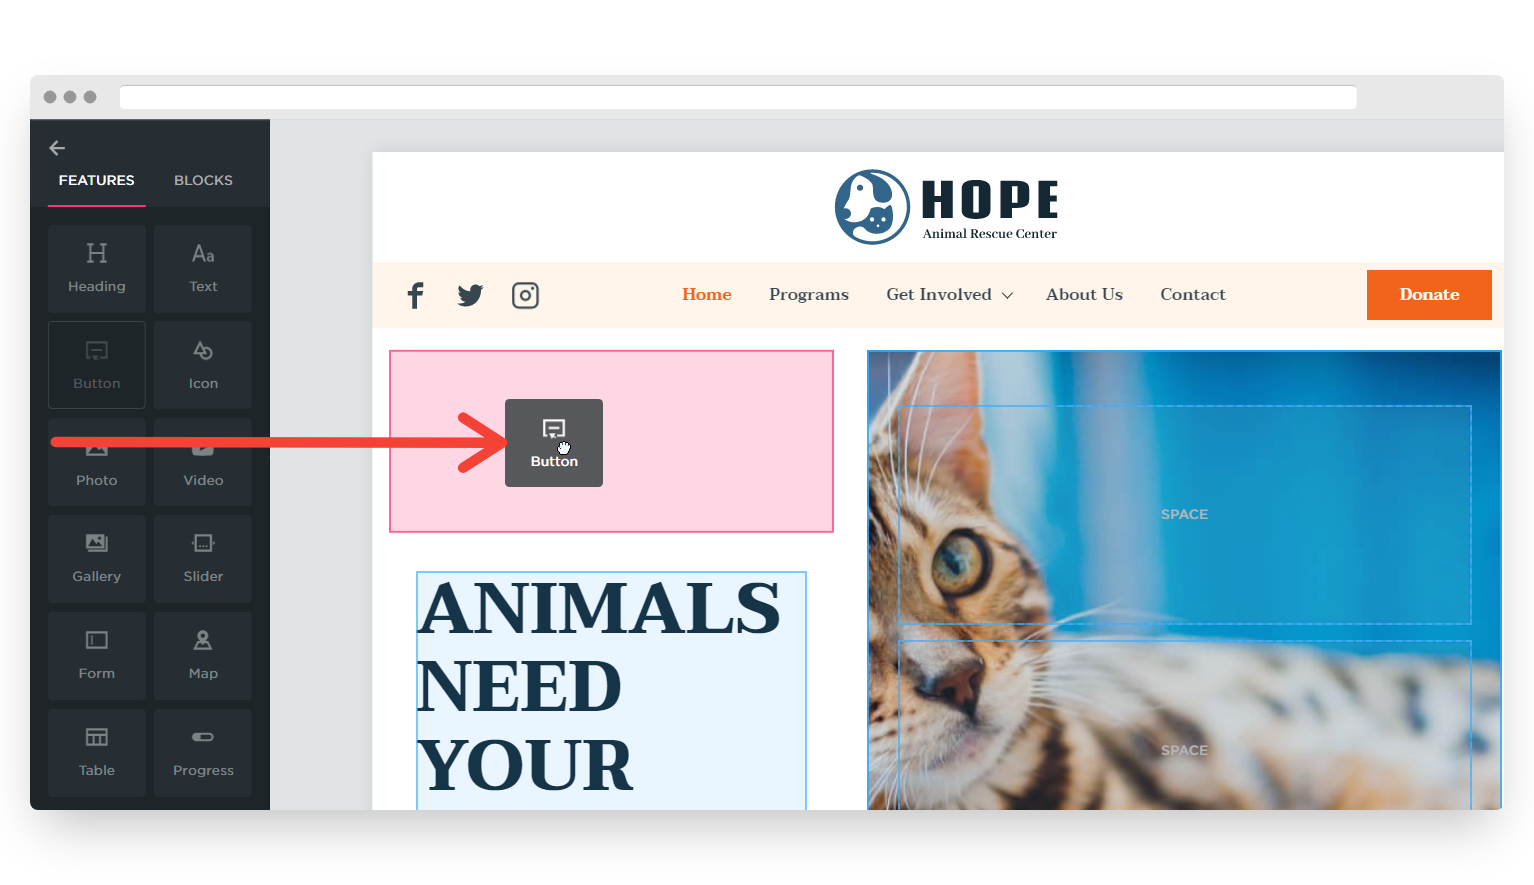
- Drag and drop the FEATURE to the desired space of the webpage.

- Customise the feature if necessary.
- Publish the site for the changes to reflect on the live website.
Remove a Website Feature
Follow the steps below to remove a website feature. Make sure to save a copy of any texts or images first to avoid losing the data when removing.
- On the canvas of the website builder, hover your cursor over the feature that you want to remove so that the box around it will show.

- Click the Remove [X] icon on the upper right corner of the box to remove the contents inside it.

- Publish the site for the changes to reflect on the live website.
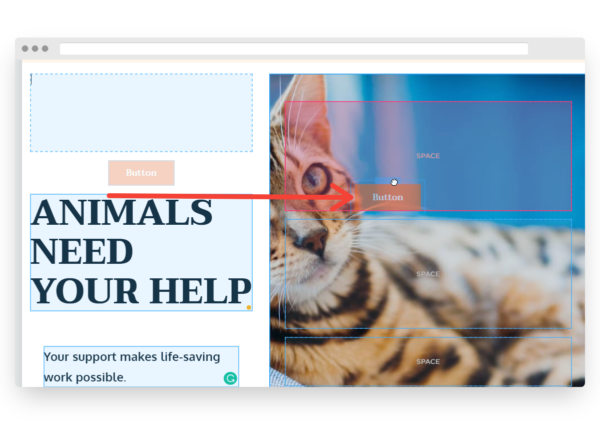
Select and Move a Website Feature
The Website Builder features can be moved around the webpage. Learn how with the steps below.
- On the canvas of the website builder, hover your cursor over the webpage feature or detail to select it.
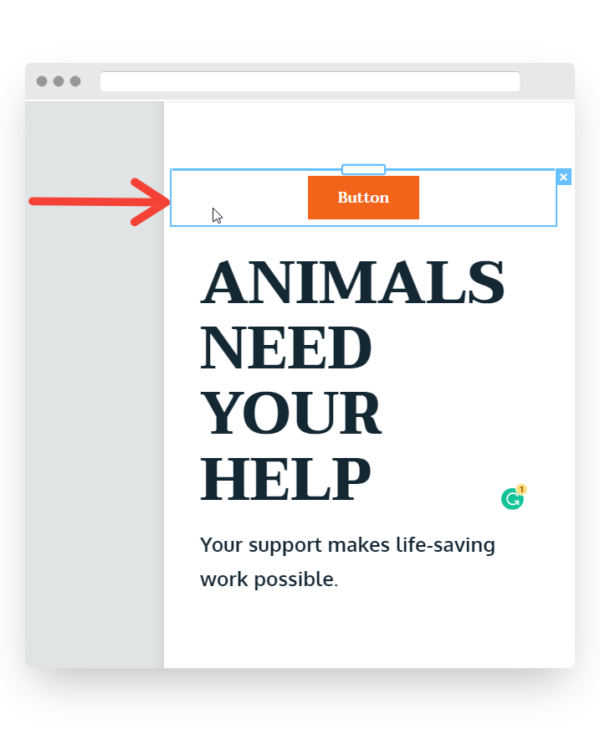
- Hold the little center rectangle at the top of the feature and drag it to where you want to move it within the webpage.

- Publish the site for the changes to reflect on the live website.
Customise a Website Feature
The settings available on each website feature vary with the type of content it holds. Like you can change the color of the button, change the font of texts, and connect your social media account, among others. The steps below will guide you on how to make those options appear.
- Double-click the contents inside the box to make the options appear at the top.
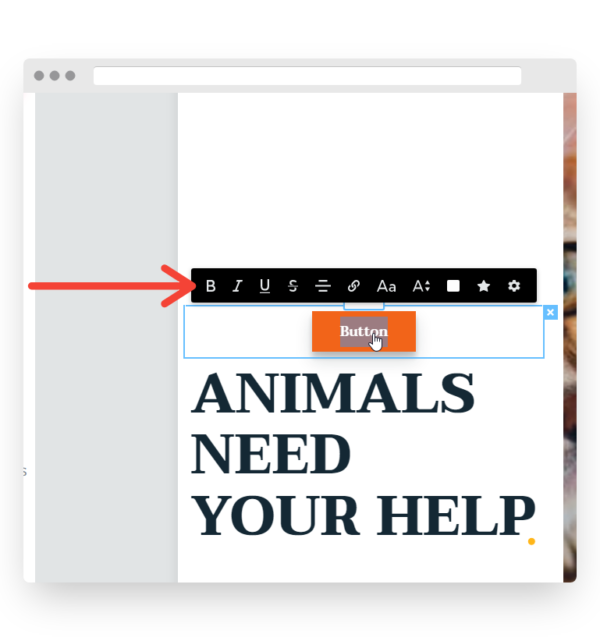
- Hover your cursor over each option to see what it’s for, and then click to select.
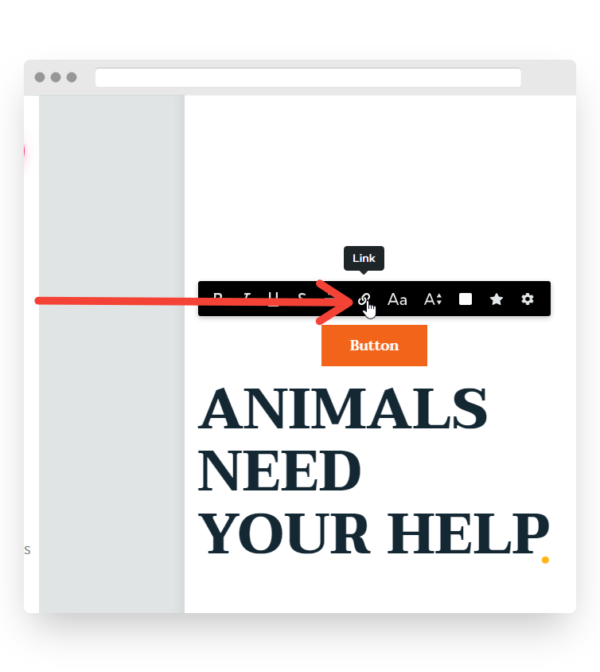
- Supply the necessary action/information to complete the changes. These are automatically saved.
- Publish the site for the changes to reflect on the live website.
Website Builder is a platform that allows you to create powerful websites without the need for any technical background, or hiring a developer for that matter. With Website Builder, you are given access to easily customisable templates, a drag-and-drop editor, a mobile editor, and a quick-setup social media integration.
One of the Website Builder tools that will help you create your website is called a Feature.
What is a Feature?
A Feature is a ready-made layout element, such as a Text item, Heading, Photo, Video, Button, Form, Map or Facebook Like, which you can use to build your custom, professional-looking website pages in Website Builder.
Accessing the Features Library
You can access the Feature you need in the library of Features, by following the steps below:
- Click Sign Up / Log In at the top of this page.
- Select Account Manager from the drop-down menu.
- Enter your username and password then, click Log In.
- Click the Visit My Account button.
- Click Website Builder from the menu at the top of the page.
- Click on the Website Builder plan that you wish to manage.
If you only have one Website Builder plan, you will automatically be redirected to its management page.
- Hover your mouse pointer over the [+] Icon at the upper right-hand section of the page and click Build Now.
- On the Sites page of your Website Builder Dashboard, hover your mouse pointer over the project/website that you would like to customise and click Edit.
Or, if you haven't started one yet, click the Create Site button at the top-right corner, then select a template and click Create This Site to start building one.
- On the Website Builder Editor, click Build from the left-side menu. You are now viewing the Features Library.
Now that you’ve learned how to locate Features, you are free to manage them to suit your needs.
Managing Website Builder Features
Website Builder gives you the freedom to manage and layout Features by yourself. You can add, customise, resize, move, and delete Features, to build your website the way you want it.
Adding Features
From the Features Library, drag your chosen Feature and drop it onto one of the available placeholders on your page.
Customising Features
To customise a Feature, select it to display the editing menu and replace the selected sample content with the actual content you would like to appear on your site. You can then modify the selected element with the help of the editing menu that appears when you highlight the text.
Resizing Features
You can also change the size of the Features on your website. Resizing Features can be done vertically and horizontally.
- To resize a Feature vertically, hover over it with the mouse cursor, click the resizing control that appears at the bottom of the Feature, and drag it upwards or downwards.
- To resize a Feature horizontally, hover over it to display parallel vertical lines to the right and to the left of it, then drag one of these vertical lines left or right.
Moving Features
Customising the location and position of the Features on your website can also be achieved by simply following the steps below:
- Hover over its upper edge with the mouse cursor to display the moving control.
- Click the moving control and drag the Feature onto a different placeholder on your page.
Deleting Features
To delete a Feature, hover over it and click the [x] Delete Button on its top right-hand corner. The Feature will then be immediately removed.
Congratulations! You now know how to manage Website Builder Features.
Fantastic...Thank you for your feedback =)
Sorry... Please submit a support ticket or try another search.